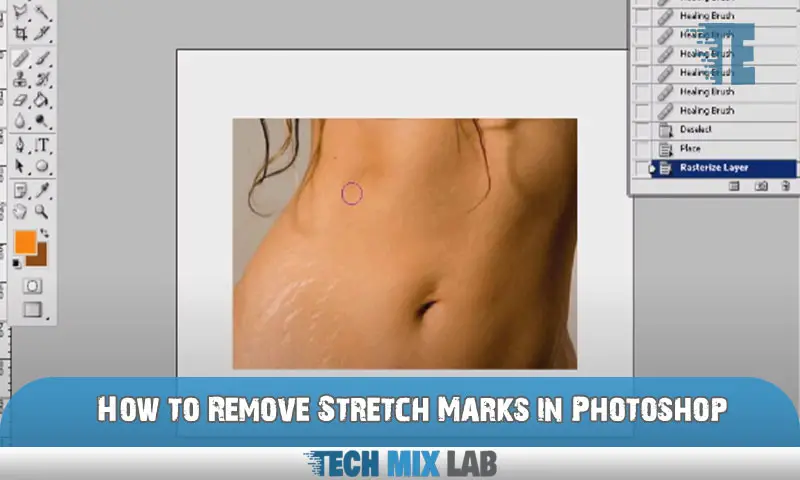
To remove stretch marks in Photoshop, use the Healing Brush tool and the Clone Stamp tool. These tools can effectively blend and replace the affected areas with the surrounding skin texture, resulting in a seamless appearance.
Stretch marks are a common concern, but with the right tools and techniques in Photoshop, you can easily edit them out. Apart from using the Healing Brush and Clone Stamp tools, you can also make use of the Spot Healing Brush and Patch tools to further refine the edits and achieve more natural-looking results.
By following these steps, you can achieve a smoother and more even skin tone in your photos, eliminating the appearance of stretch marks.
Understanding Stretch Marks And Their Impact
Stretch marks are a common concern that many people face today. Understanding the factors that contribute to their development is crucial. Not only do these marks affect us physically, but they also have a significant impact on our emotional well-being.
That’s where Photoshop comes in. By addressing stretch marks using this powerful tool, we can restore confidence and enhance our self-image. With Photoshop, we can seamlessly remove stretch marks, making them virtually disappear. This not only improves the appearance of our skin but also allows us to feel more comfortable and at ease in our own bodies.
So, if you’re looking to eliminate those pesky stretch marks, Photoshop offers an effective and efficient solution. Say goodbye to insecurities and hello to flawless skin with the magic of Photoshop.
Preparing The Image For Stretch Mark Removal
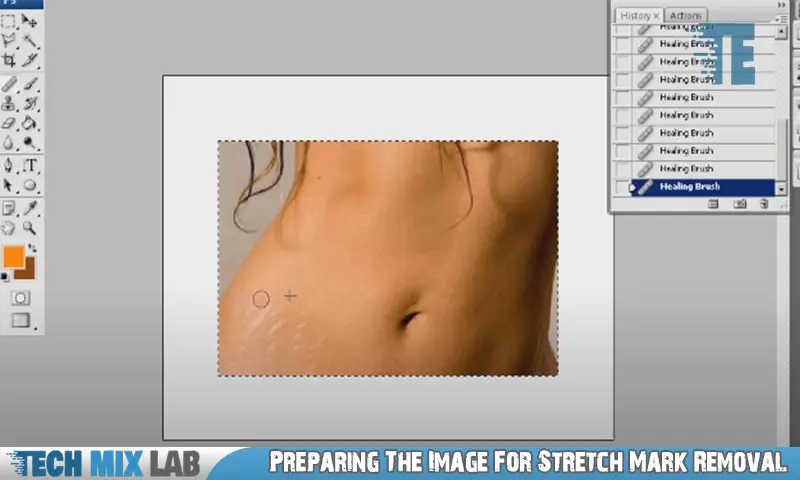
Preparing the image for stretch mark removal involves selecting the right image for editing and adjusting its lighting and contrast to improve visibility. With the help of Photoshop tools, one can enhance the quality of the image and effectively remove stretch marks.
By carefully choosing the ideal image, the editing process becomes more seamless. Adjusting the lighting and contrast ensures that the stretch marks are clearly visible for removal. Photoshop tools offer a range of options to enhance the image quality, making it easier to smooth the skin and remove any unsightly marks.
With these steps, you can achieve a flawless result in removing stretch marks through Photoshop editing techniques.
Applying Skin Smoothing Techniques
Remove stretch marks in Photoshop by applying skin smoothing techniques. Utilize the Healing Brush tool to seamlessly reduce their visibility. Use the Clone Stamp tool to target specific areas, making them blend in naturally. Employ blurring techniques to soften the appearance of stretch marks, creating a smoother skin tone.
With these Photoshop tools at your disposal, you can transform blemished skin into a flawless canvas. Enhance your photographs by effortlessly removing stretch marks, giving your subjects a boost of confidence. Achieve professional-level results with just a few simple steps in Photoshop.
Let your creativity shine as you erase imperfections and create stunning images. Say goodbye to stretch marks and hello to picture-perfect skin with Photoshop’s powerful editing capabilities.
Color Correction And Blending Tips
Stretch marks can be easily removed in Photoshop by using color correction and blending techniques. One effective method is matching the skin tone for a seamless finish. Adjustment layers are a useful tool for correcting skin tone and achieving the desired color balance.
Blending techniques, on the other hand, help create a natural look by seamlessly blending the edited areas with the rest of the image. By combining these two techniques, stretch marks can be effectively removed and the skin can appear smoother and more even-toned.
It’s important to pay attention to detail and ensure that the edits remain realistic and natural-looking. With practice and experimentation, anyone can master the art of removing stretch marks in Photoshop.
Enhancing Skin Texture And Elasticity
Utilizing the Liquify tool in Photoshop can restore skin texture by applying techniques that enhance skin elasticity. By carefully manipulating the tool, you can remove stretch marks and achieve a more youthful appearance. With precise adjustments, you can restore the skin’s natural texture and make it look smoother and more refreshed.
The Liquify tool allows you to reshape and refine specific areas, ensuring that the skin looks more elastic and rejuvenated. By targeting the affected areas, you can remove the visible signs of stretch marks, resulting in a seamless and flawless skin texture.
With these advanced techniques, Photoshop becomes a powerful tool for improving the overall aesthetic of skin, giving you the ability to create stunning and enhanced images.
Final Touches And Enhancements
To remove stretch marks in Photoshop, you can achieve final touches and enhancements. Utilize the Dodge and Burn tools for additional enhancements. Add highlights and shadows to create a realistic result. Fine-tune the image for a polished look. By following these steps, you can effectively remove stretch marks and improve the overall appearance of the photo.
With careful attention to detail and the proper use of Photoshop tools, you can create a flawless image. Say goodbye to unsightly stretch marks with this simple and effective editing process. Transform your photos and achieve the desired look with these professional techniques.
Bring out the best in your images and impress your audience with your editing skills.
Saving And Exporting The Edited Image
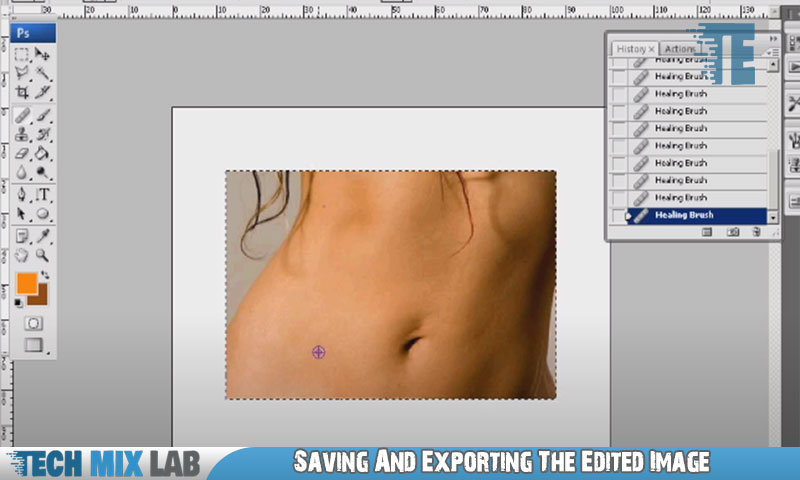
Saving and exporting the edited image is a crucial step in Photoshop. To achieve optimum quality, it is important to choose the appropriate file format based on the purpose of the image. For web use, consider using PNG or JPEG formats, while for print, use TIFF or PSD formats.
Each format has its own benefits and considerations, such as file size and transparency support. Additionally, when saving the image, make sure to carefully adjust the compression settings to preserve the details and minimize any loss in quality. Once the image is saved, it is recommended to maintain a backup copy and organize it in a separate folder.
This ensures easy access and future use of the edited image, without the need to recreate or re-edit it from scratch. By following these tips, you can effectively save and export the edited image in Photoshop.
Professional Tips And Best Practices
Professional Photoshop users have shared their top tips and best practices for removing stretch marks in Photoshop.
FAQ
How Do I Remove Marks In Photoshop?
To remove marks in Photoshop, follow these simple steps: 1. Open the image in Photoshop. 2. Select the “Spot Healing Brush Tool” from the toolbar. 3. Adjust the brush size according to the mark and brush over it. 4. If the mark is complex, use the “Clone Stamp Tool” instead.
How Can I Remove Stretch Marks?
To remove stretch marks, you can try these methods: 1. Use topical creams or oils specifically designed to fade stretch marks. 2. Regularly exfoliate the affected area to promote skin cell turnover. 3. Moisturize the skin to improve its elasticity and reduce the appearance of stretch marks.
How Do I Remove Unwanted Lines From An Image In Photoshop?
To remove unwanted lines from an image in Photoshop, follow these steps. First, open the image in Photoshop. Then, select the “Spot Healing Brush Tool” from the toolbar. Next, adjust the brush size to match the width of the unwanted lines.
Conclusion
After following these simple steps in Photoshop, you can effectively remove stretch marks from your photographs. By using the Spot Healing Brush Tool, you can seamlessly blend the affected areas with the surrounding skin, achieving a natural and flawless look.
The Clone Stamp Tool allows you to carefully copy and paste healthy skin texture over stretch marks, further enhancing the final result. Additionally, the Liquify Filter can help you adjust the shape and size of the stretched areas to create a more proportionate appearance.
Remember, practice makes perfect, so don’t be discouraged if your first attempts are not exactly what you hoped for. With time and patience, you will become more proficient and confident in your ability to remove stretch marks in Photoshop. So go ahead and give it a try and watch your photographs transform into stunning works of art.
You have the power to create a world where stretch marks are a thing of the past!