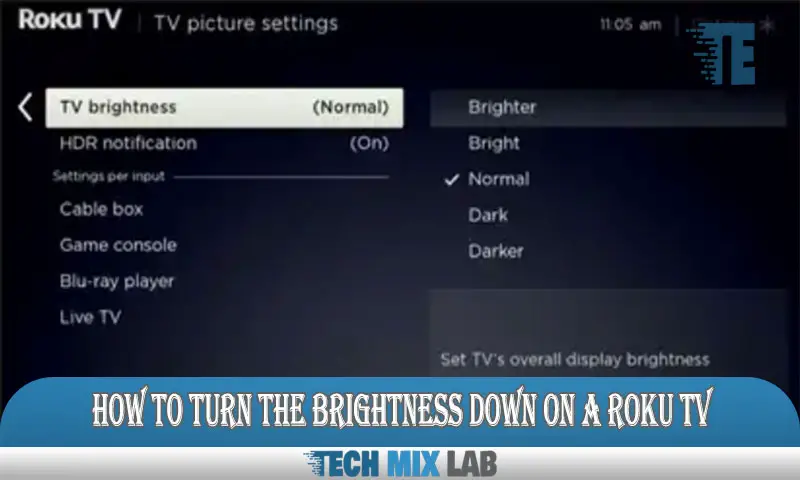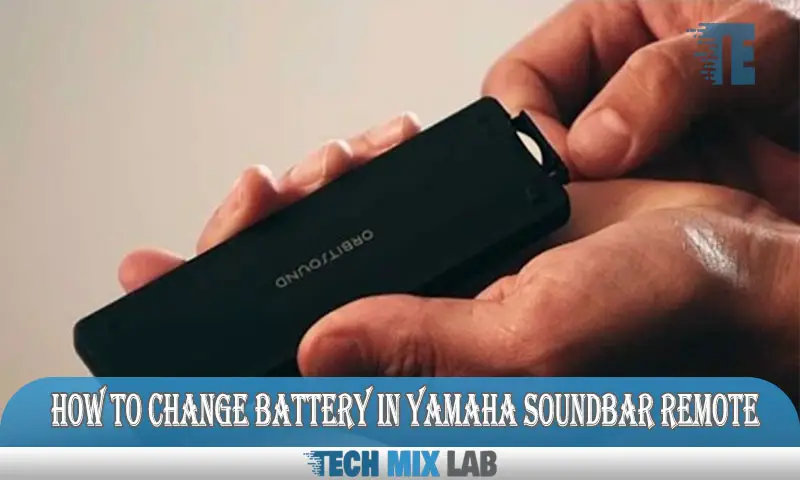
To change the battery in your Yamaha soundbar remote, locate the battery compartment on the back of the remote and remove the old battery. Insert a new battery, ensuring it is placed correctly with the positive and negative terminals aligned.
Yamaha soundbars offer an immersive audio experience, and their remotes are essential for controlling various functions. However, when the battery of the Yamaha soundbar remote runs out, it’s important to know how to change it. In this guide, we will provide step-by-step instructions on how to replace the battery in your Yamaha soundbar remote.
By following these easy steps, you can quickly get your remote up and running again, allowing you to effortlessly control your soundbar and enjoy your favorite music and movies without any interruptions. So, let’s get started and learn how to change the battery in your Yamaha soundbar remote.
Why Change Battery In Yamaha Soundbar Remote?

Changing the battery in your Yamaha soundbar remote is essential to maintaining the sound quality. The remote plays a crucial role in controlling the functions of the soundbar, and a weak battery can result in unresponsive or delayed commands. Regularly replacing the battery ensures smooth functionality and prevents any interruptions during your audio experience.
It is important to carefully follow the instructions provided by Yamaha for the correct battery replacement. By doing so, you can maintain the optimum performance of your soundbar remote and enjoy the high-quality sound it delivers. So, make sure to keep an eye on the battery level and replace it when necessary to ensure a seamless audio experience.
Step-By-Step Guide To Changing Battery
Changing the battery in your Yamaha Soundbar remote is a simple process that can be done in a few easy steps. First, locate the battery compartment on the back of the remote. Next, remove the old battery by pushing the latch and sliding it out.
Then, insert the new battery, making sure it is placed correctly. Finally, test the remote by pressing various buttons to ensure it is working properly. Following these steps will ensure that your Yamaha Soundbar remote continues to function effectively and efficiently.
Keep your entertainment experience hassle-free by regularly changing the battery in your remote.
Choosing The Right Battery

Selecting the right battery for your Yamaha soundbar remote is crucial. Different types of batteries can be compatible with your remote. When choosing a battery, consider factors such as its voltage, size, and longevity. It’s important to ensure that the battery matches the specifications required by the remote.
Opting for a high-quality battery will ensure optimal performance and longevity. Be aware of the different types of batteries available, such as alkaline, lithium, or rechargeable batteries, and choose the one that best suits your needs. Additionally, check if the battery is easily accessible and replaceable.
By following these guidelines, you can change the battery in your Yamaha soundbar remote effectively.
Troubleshooting Common Issues
Changing the battery in your Yamaha soundbar remote is a simple and straightforward process. If you are experiencing issues with your remote not working after a battery replacement, there are a few troubleshooting steps you can try. First, make sure the remote buttons are clean and free from any debris that may be blocking their function.
Additionally, check that the battery is properly inserted and secured in the battery compartment. If the problem persists, try resetting the remote by removing the battery and holding down the power button for a few seconds. This can help to recalibrate the remote and restore its functionality.
If none of these steps work, it may be necessary to replace the remote altogether. Consider contacting Yamaha customer support for further assistance.
Prolonging Battery Life
The battery life of your Yamaha soundbar remote can be extended by following a few simple tips. First, make sure to turn off the remote when you’re not using it. This helps conserve battery power and prolong its lifespan.
Additionally, avoid keeping the remote in areas with extreme temperatures, as this can affect the battery’s performance. Another useful tip is to remove the batteries if you won’t be using the remote for an extended period. This prevents any potential leakage or corrosion.
Furthermore, using high-quality batteries can also contribute to longer battery life. Lastly, ensure that the battery compartment is clean and free from dust and debris, as this can interfere with battery performance. By following these tips, you can enjoy uninterrupted use of your Yamaha soundbar remote.
Cleaning The Remote
Maintaining the functionality of your Yamaha soundbar remote requires regular cleaning to remove dirt and dust. Start by gently wiping the surface of the remote with a soft, lint-free cloth. Pay special attention to the buttons and crevices where dirt tends to accumulate.
If the dirt is stubborn, dampen the cloth with a mild solution of water and gentle soap. Be sure to wring out the cloth before wiping the remote to prevent moisture damage. Avoid using harsh chemicals or abrasive materials that could scratch the surface.
Once the remote is clean, allow it to air dry completely before inserting new batteries. This simple cleaning routine will help ensure optimal performance and extend the lifespan of your Yamaha soundbar remote.
Other Maintenance Tips
Changing the battery in your Yamaha Soundbar remote is a simple process. First, remove the battery cover. Next, take out the old battery and replace it with a new one. Make sure to align the battery properly. Additionally, ensure that you dispose of the old battery in a safe, environmentally friendly manner.
Apart from changing the battery, there are other maintenance tips to keep in mind. One important aspect is ensuring the proper storage of the remote. Store it in a cool and dry place to prevent any damage. Moreover, updating the firmware regularly is crucial for optimal performance.
You can do this by adhering to Yamaha’s instructions. By following these tips, you can ensure that your Yamaha Soundbar remote functions smoothly.
Enhancing Sound Experience
Enhancing your sound experience is made easy with the Yamaha soundbar remote. By exploring additional features and settings on the soundbar, you can optimize the sound for different environments. Adjusting the bass, treble, and surround sound settings allows you to customize the audio to your preference.
Whether you are watching a movie, listening to music, or gaming, the soundbar remote puts you in control. To change the battery in the remote, simply remove the battery cover and replace the old battery with a new one. With the convenience of the Yamaha soundbar remote, you can enjoy immersive sound without any hassle.
Experience enhanced audio quality with just a few clicks on your remote.
Conclusion
Changing the battery in your Yamaha Soundbar remote is a simple and essential task for ensuring optimal performance. By following the steps mentioned in this blog post, you can easily replace the battery in just a few minutes. Remember to check the type of battery your remote requires and have a replacement ready beforehand.
Start by locating the battery compartment on the back of the remote and opening it using a small tool or your fingernail. Carefully remove the old battery and insert the new one, making sure the positive (+) and negative (-) ends align correctly.
Once the battery is in place, close the compartment securely. With a fresh battery, your Yamaha Soundbar remote will be ready to control your audio experience effortlessly. Keep in mind that regular battery changes help maintain optimal functionality and prevent interruptions while using your soundbar.
Keep enjoying your favorite tunes without any hassle!