Changing channels on a motorola walkie talkie is a crucial feature to maximize communication effectiveness. With an overview of motorola walkie talkies, it is important to understand the various models available. Each model offers unique capabilities and functionalities. By changing channels, users can avoid interference from other devices and find a clear communication line.
Walkie talkies typically have multiple channels that can be easily switched, allowing users to connect with different groups or individuals. Changing channels ensures that the signal is clear and uninterrupted, resulting in efficient communication between users. Whether it’s for personal use or professional applications, knowing how to change channels on a motorola walkie talkie is key to effective communication.
Identifying The Channel Knob
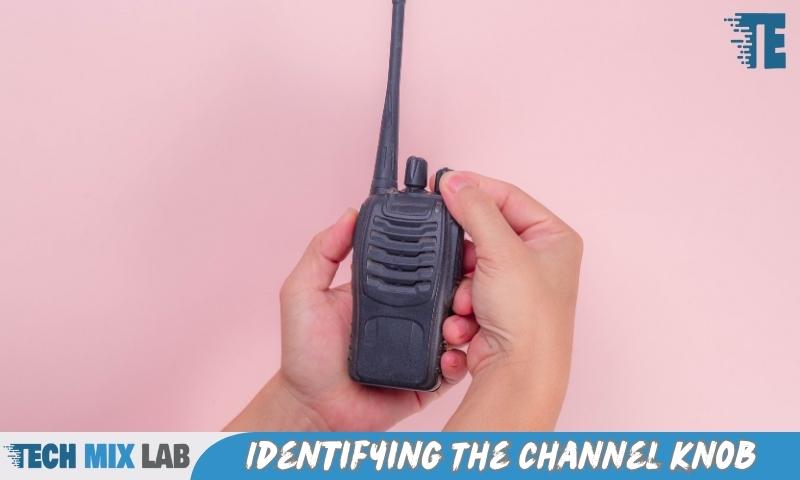
To change the channel on a motorola walkie talkie, the first step is identifying the channel knob. Locate the channel knob on the walkie talkie device. Turn the knob to change to the desired channel. Ensure that you select the correct channel for communication.
After selecting the channel, you can use the walkie talkie to communicate with others on the same channel. It is important to familiarize yourself with the location of the channel knob to easily change channels when needed. By following these steps, you can effectively change the channel on a motorola walkie talkie and stay in constant communication with others.
Understanding Channel Numbers

Changing channels on a motorola walkie talkie is a simple process. Step two involves understanding the significance of channel numbers. Each channel is assigned a unique number, facilitating communication between walkie talkies. The channel number determines the frequency and range of the device.
By changing the channel, you can establish communication with other individuals or groups on the same channel. Remember to check the user manual for your specific model to locate the channel change button. Once you locate it, press the button and use the channel selector knob to change to the desired channel number.
Ensure that all walkie talkies are set to the same channel for effective communication. Happy channel-changing!
Powering On The Walkie Talkie
To power on the motorola walkie talkie, locate the power button on the device. Press and hold the power button for a few seconds until the device powers on. Once the walkie talkie is successfully powered on, you will hear a beep sound indicating its activation.
After powering on the device, you can proceed to change channels by pressing the channel up or down button. Each press will cycle through the available channels. Once you have selected the desired channel, release the button and the walkie talkie will be set to that specific channel.
This allows you to communicate with other walkie talkies that are tuned to the same channel frequency. Ensure to check the channel selected on your walkie talkie to ensure effective communication with other users.
Entering The Channel Change Mode
To change the channel on a motorola walkie talkie, you need to follow specific steps. One of these steps is entering channel change mode. This mode allows you to access the walkie talkie menu where you can make the necessary channel adjustments.
By following the instructions provided by motorola, you can easily navigate through the menu and change the channel to the desired frequency. It is important to note that changing the channel is crucial for clear communication and to avoid interference from other walkie talkies operating on the same frequency.
Accessing the channel change mode will give you the ability to customize your walkie talkie settings and ensure effective communication with your team.
Selecting The Desired Channel
To change the channel on a motorola walkie talkie, follow these steps. In step five, select the desired channel by pressing the channel button. Rotate the channel knob until your desired channel number appears on the display. Each channel has a specific number you can choose from.
It’s important to select the right channel for effective communication. Make sure to confirm the channel by listening for any activity or testing with another walkie talkie user. Changing channels on a motorola walkie talkie is simple and allow for seamless communication in various situations.
Stay connected by selecting the appropriate channel for your needs.
Confirming Channel Selection
To confirm the channel selection on your motorola walkie talkie, follow these steps. Once you have selected the desired channel, proceed with pressing the PTT (push to talk) button to verify if the channel has been changed successfully. Listen for any audio feedback or static, which would indicate that the channel has indeed been modified.
If you hear no sound or static, double-check the channel settings on your device. Ensure that you have followed the correct steps and selected the appropriate channel. It is crucial to verify the new channel selection to ensure effective communication with your team or group.
Take the time to confirm the change before using the motorola walkie talkie for any important conversations or coordination.
Testing Communications
To ensure the successful change of channels on your motorola walkie talkie, it is important to test the communications. Once you have followed the previous steps and adjusted the settings accordingly, take a moment to verify the new channel. Begin by speaking into the walkie talkie on one device and listening for any transmission on the other device.
This will confirm that communication is working effectively on the new channel. Additionally, you can also try sending and receiving messages to test the clarity of the communication. By conducting these tests, you can ensure that the channel change has been successful and that you can communicate without any issues.
Remember to repeat this process whenever you need to change channels on your motorola walkie talkie. By testing the communication, you can confidently rely on your device for clear and effective communication.
Adjusting The Squelch Level
To change the channel on your motorola walkie talkie, follow step eight: adjusting the squelch level. Squelch is a function that helps improve reception by filtering out unwanted noise. By understanding squelch and adjusting its level, you can ensure better communication.
To do this, locate the squelch knob or menu option on your device and turn it on until the background noise disappears. Be careful not to set it too high, as this may mute weaker signals. Experiment with different squelch levels to find the optimal setting for your environment.
With the right squelch level, you’ll enjoy clearer and interference-free communication on your motorola walkie talkie.
Troubleshooting Common Channel Change Issues
Changing channels on a motorola walkie talkie can sometimes be a daunting task. However, there are common issues that can be easily addressed. One common problem is when the channel change button fails to respond. In such cases, checking the battery level and replacing it if necessary can resolve the issue.
Another issue is when the walkie talkie automatically switches back to the default channel. To fix this, disabling any auto-switching feature in the settings can help. Additionally, interference from other devices can disrupt channel changes. Moving away from these devices or changing the walkie talkie’s location may solve the problem.
Understanding these common issues and troubleshooting them will ensure smooth and hassle-free channel changes on your motorola walkie talkie.
FAQ
Can I Change The Channel During A Conversation?
Yes, you can change the channel on your motorola walkie talkie even during an ongoing conversation. Just remember that when you switch channels, you won’t be able to hear or communicate with the members on the previous channel.
How Many Channels Does A Motorola Walkie Talkie Have?
Most motorola walkie talkies come with multiple channel options, typically ranging from 8 to 22 channels. However, it’s important to check the specific model of your device for the exact number of available channels.
Does Changing The Channel Affect The Transmit Power?
No, changing the channel on your motorola walkie talkie does not affect the transmit power. The transmit power remains the same, regardless of the channel you are using. However, it’s always a good practice to check the transmit power settings of your device to ensure optimal communication range.
Conclusion
Changing channels on a motorola walkie talkie is a simple and essential task to ensure clear communication. By following the steps outlined in this blog post, you can easily navigate the menu options and switch between channels. Remember to always refer to the user manual for specific instructions and consult the different models’ specifications for any additional features.
It is crucial to choose the appropriate channel based on the environment and required range. With a wide range of channel options available, motorola walkie talkies provide flexibility and versatility for various communication needs. Whether you are using them for professional purposes or recreational activities, knowing how to change channels on your motorola walkie talkie will enhance your communication experience and allow for seamless interaction with your team.
Stay connected and communicate effectively with your Motorola walkie-talkie by mastering the channel changing process.